Mission 2 — Send Your First Transaction
Before starting make sure you funded your Vaulta account with a small amount of $A and you are already logged in to Blocksfinity with the Vaulta account you want to use. In this example, we use the account supportacc1h@active.
Note: To fund your account, purchase $A on any exchange that supports (deposits and) withdrawals to the Vaulta network, and then transfer $A from the exchange to your Vaulta account name (maximum 12 characters).
Step 1 — Open the Transfer page
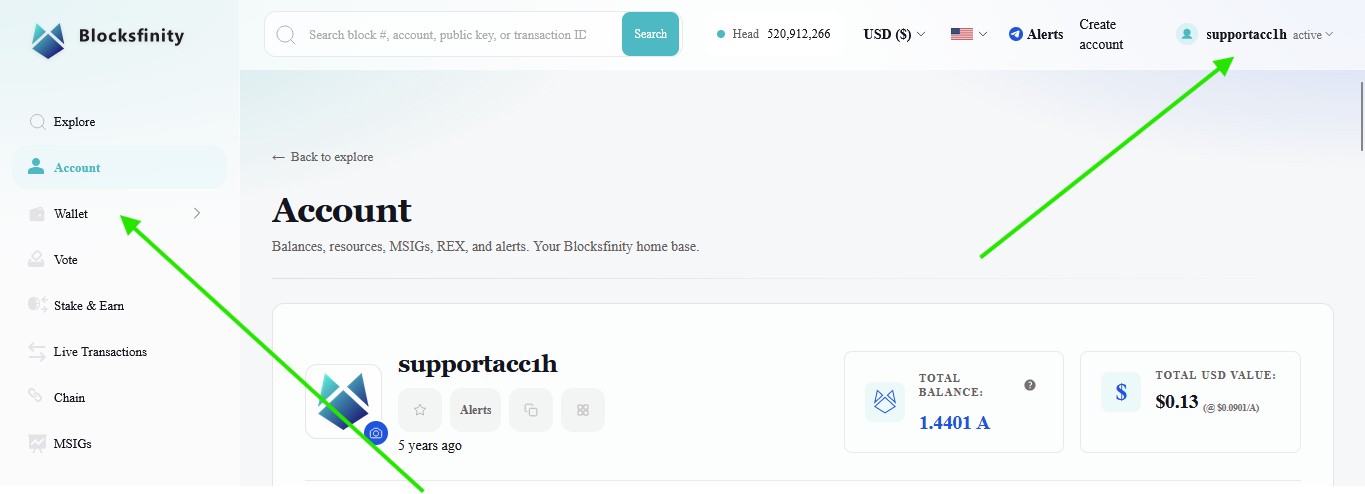
In Blocksfinity.com, login with the account you want to use and go to:
Wallet → Transfer
This opens the token transfer form.
Step 2 — Prepare the transaction
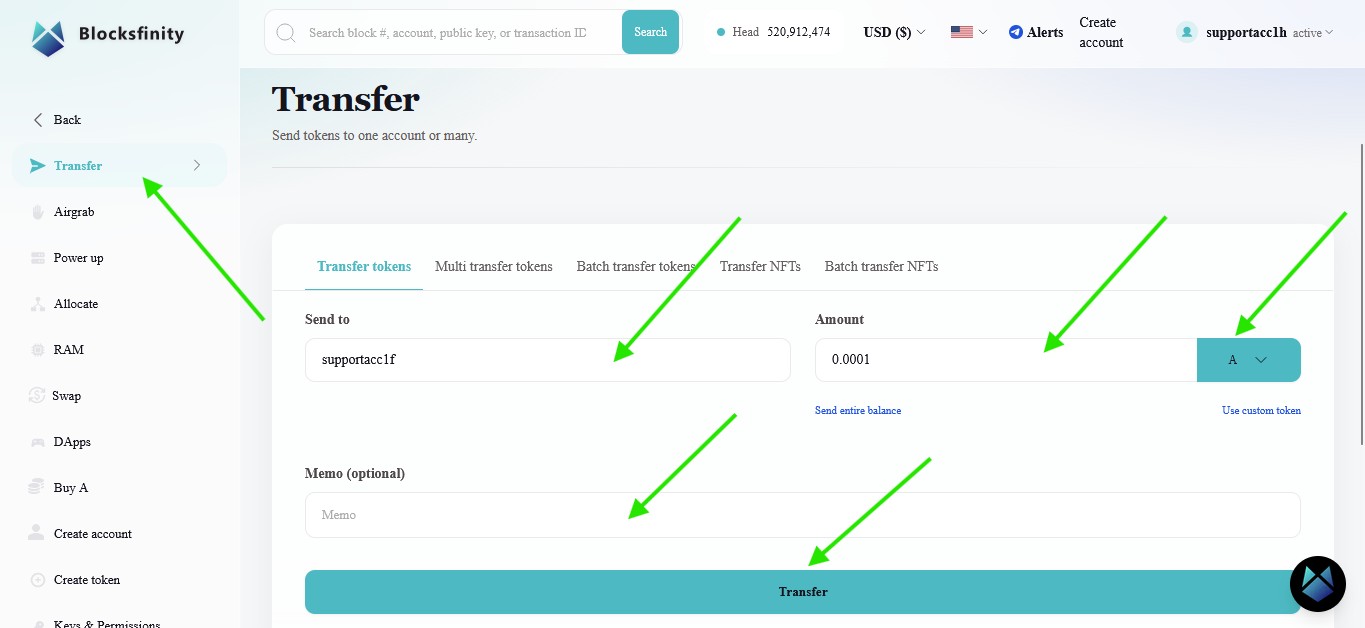
Fill in the transfer form:
Send to: the recipient account name
In this example:supportacc1fAmount: the amount you want to send
In this example:0.0001Token: select
AMemo (optional): leave blank unless the recipient specifically requires one
Then click Transfer.
About the memo
The memo is an optional text field attached to a token transfer. On Vaulta (former EOS) token transfers, the memo is limited to 256 bytes. That is a byte limit, not strictly a character limit, so plain ASCII text can usually use up to 256 characters, while some special characters or emojis can reduce the usable length.
In many normal wallet-to-wallet transfers, the memo can be left empty.
However, exchanges often require a memo. That is because they may use one shared blockchain account for many customers and identify each customer internally by a unique number in the memo.
For example, an exchange may instruct a user to:
send funds to the account
bybitdepositand include a unique memo such as
500234161
In that case, the account name identifies the exchange deposit wallet, and the memo identifies the user inside the exchange.
Important: If an exchange gives you a memo, enter it exactly as provided. A missing or incorrect memo may cause the funds to arrive on-chain but not be credited automatically to your exchange account.
Step 3 — Review the transaction details
After clicking Transfer, Blocksfinity shows a confirmation dialog.
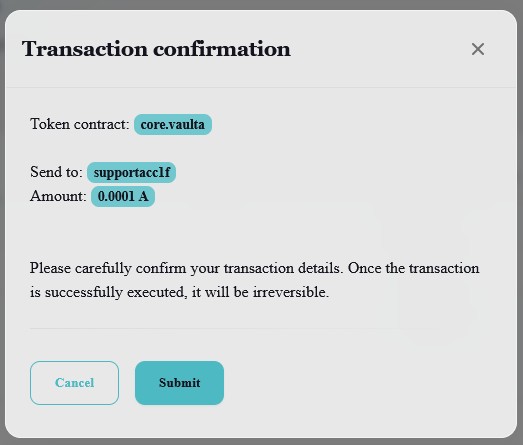
Review the details carefully:
Token contract:
core.vaultaSend to:
supportacc1fAmount:
0.0001 A
If the details are correct, click Submit.
Step 4 — Sign the transaction
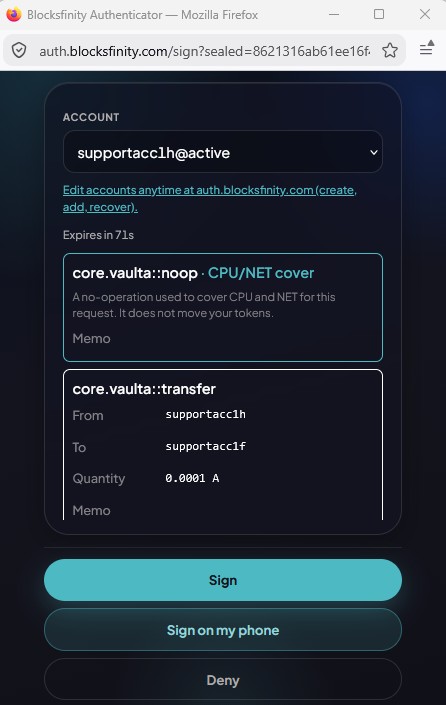
After you submit the transfer, Blocksfinity opens a signing request in Blocksfinity Authenticator.
Login to Blocksfinity Authenticator
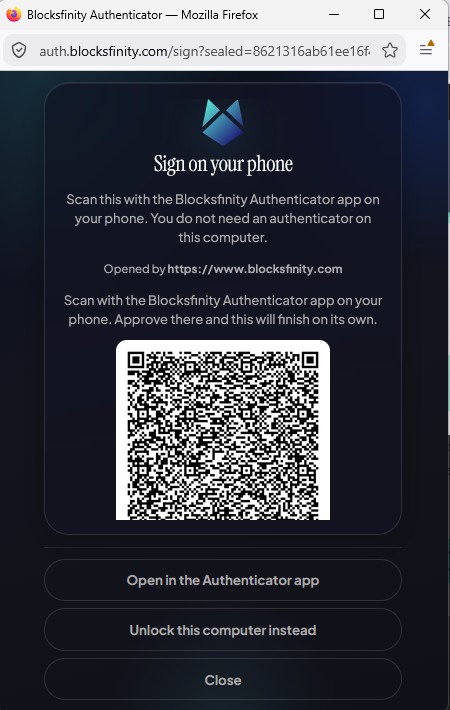
Then review the transaction again in the signing window. In this example, it shows:
Account:
supportacc1h@activeAction:
core.vaulta::transferFrom:
supportacc1hTo:
supportacc1fQuantity:
0.0001 A
If everything is correct, click Sign.
Step 5 — Broadcast the transaction
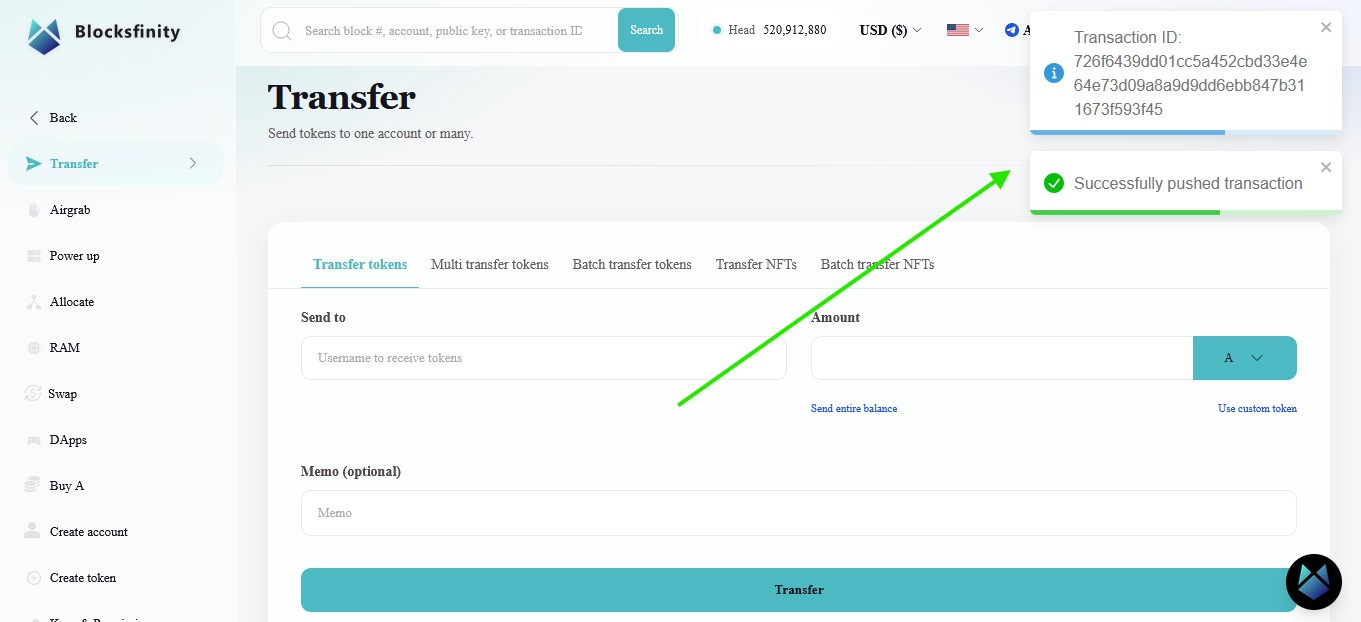
After you sign, Blocksfinity Authenticator submits the signed transaction to the blockchain network.
This is the broadcast step — the signed transaction is pushed on-chain for processing.
If the broadcast is successful, Blocksfinity Explorer displays a success notification.
Successfully pushed transaction
It also shows the transaction ID.
Step 7 — Find the transaction in your account history
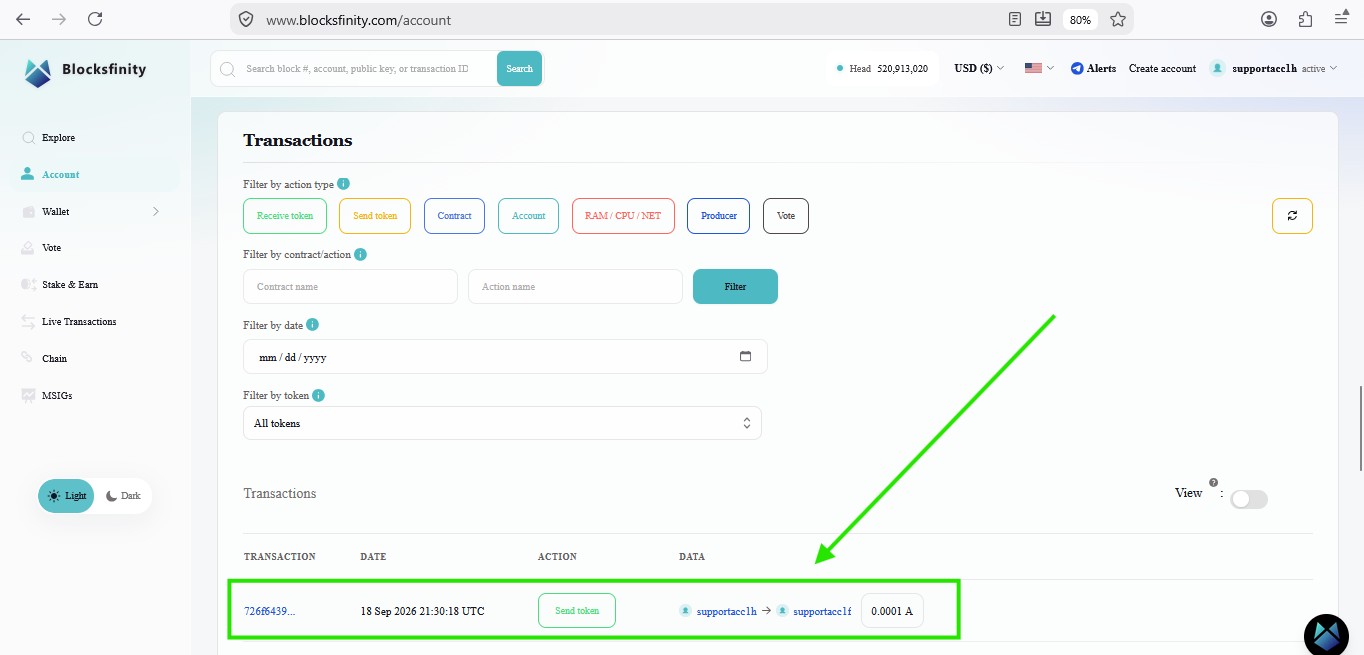
To verify the transfer, go back to your account page https://www.blocksfinity.com/account and scroll down to the Transactions section.
You should now see the transaction listed in your history, including:
the transaction type
the sender and recipient
the amount sent
the transaction ID (usually shown in shortened form in the list: 726f6439...)
In this example, the transaction history shows a Send token action from supportacc1h to supportacc1f for 0.0001 A.
Step 8 — Create account alerts
You can create and configure your account alerts here: https://www.blocksfinity.com/alerts
Blocksfinity currently supports free account alerts for eMail, Telegram, Slack, WhatsApp and Blocksfinity in-app inbox.
Create another transaction and observe the alert.
Result
You have now completed the full Vaulta transaction lifecycle with the Blocksfinity Explorer and Authenticator:
Prepare the transfer on the Explorer
Review the details in the Explorer and in the Authenticator
Sign the transaction with the Authenticator
Broadcast it to the blockchain
Confirm it succeeded
Find the transaction afterward using its history entry and transaction ID
Get notified when something happens with your account
Last updated:
Was this article helpful?
Have a specific question about this article?